DISCLAIMER: I am not an experienced person when it comes to these things. I'm just a first timer who bought a bike case, stared at it for a while, read everything he could find on how to stuff his bike in it and went for it unafraid of the consequences. Ok... I was afraid. Very much so in fact. But I still managed to get it there and back successfully so I must have done something right. Undertake this effort at your own risk. If you are not comfortable doing this, then don't. Talk to your local bike shop about doing it for you. Often times you can ship it bike shop to bike shop and have the two shops take care of assembly, dissasembly for you. But if you are comfortable with a few hand tools and unafraid then read on. Again... if you screw something up... it ain't my fault!
Back in May I decided to plan an impromptu trip to visit a friend of mine on the west coast for two weeks to relax, escape work, and train my butt off for two weeks. Which meant I wanted to bring my bike with me. I also travel extensively with work so investing in a bike case to bring my bike with me on longer trips was something I definitely wanted to do. It seems like there are a wide variety of bike cases to choose from. The least expensive category of which are soft cases (not recommended for air travel, but good for car packing, bus trips), hard cases in the 200-300 dollar range such as my Pro Bike Case, and the Thule bike case, and hard cases closer to the 500 dollar range that offer more features such as special pockets for your wheels and more internal features. In the end I chose the Pro Bike Case available through Nashbar. ( I have no affiliation with either the manufacturer of this product or with Nashbar). I chose this particular case for a few reasons...
-its very large which meant I wouldn't have to disassemble my bike as much, and I could leave the tricky bits such as the rear derailleur attached.
-it comes with an internal metal frame that your bike attaches to which makes packing it a bit easier.
-you can also fit a lot of other stuff in it such as your wetsuit, helmets, water bottles, bike shoes etc.
-it came well recommended from a fellow triathlete in my local club. (Thanks Jon!)
-it was on sale for around 200 dollars and therefore fit into my budget nicely.
It arrived within about a week of ordering it in a very very large box. This particular case is not easy to move around by yourself. Its BIG! Its tricky to carry it up and down stairs even when its empty. So keep this in mind depending on your living situation. I had to get help to carry it up the stairs into and out of my appartment's narrow staircases.
The dimensions of the case itself are:
External dimensions: 49.6" x 33.5" x 12.6"
Internal dimensions: 49" x 33" x 12"
Weight: 40 lbs. (empty)
Keep in mind that once you stuff a bike in this case it will be considered an oversize and overweight package by just about every airline and shipping carrier out there. So check with their fees and policies before you ship/fly with them. In fact its a good idea to check on that before you buy your airline ticket as some airlines are much more expensive than others to bring a bike on board with.
So how do you stuff your bike in this thing? Below are the steps I took to make it work. I'm a fairly short guy at 5'6" so my bike is sized accordingly. Taller people with larger bikes may have to consider removing the handlebars entirely and attaching them to the frame with the cables still attached, and also marking the seatpost height and then removing it. I did not have to do any of this. (See there are some pluses to being short!) However, one of the pluses to a case this big is that larger bikes should fit in it without any trouble at all. Hec with careful packing (and not using the internal frame) you could probably fit two bikes in this thing.
So onto the process....
When it arrives and you unpack it from its giant cardboard container here's what it looks like. Well sort of. It doesn't come with the writing on it. I added that. Which incidentally silver sharpie works great on this box so be sure and write some friendly instructions on the box for the TSA saying which side is up and down, and with your contact info on it. Its a fairly smooth shiny plastic so I'm not sure how well sticky labels would stay on it, so I would recommend writing directly on the box if I were you. I should also note that the blue straps are not included with the box. They were purchased from Home Depot and I highly recommend you do the same as extra insurance that the box stays closed.

When you open the case for the first time inside it you will find a few items.
-two extra wheels (this was troubling to me... it comes with two extra wheels right out of the gate? does that mean the one's it comes with are bound to get broken off in no time?)
-a spreader bar looking thing (the narrow white tube with the circular ends) that isn't mentioned in the instructions at all. I suspect that you should try and place it somewhere in the middle of the case to keep the sides from getting pushed in, and thats what I did with it.
-an additional metal bar that can be added to the fork adapter if needed to get the spacing correct so your bike fits on the internal metal frame.
-and not shown in this photo is the metal frame that your bike will attach to. (it is shown in some later photos)
Here's a shot of the inside of the box and the contents (minus the metal frame)

The first step to this process was to read the instructions. They were somewhat helpful but understandably generalized as there are many ways to stuff a bike in this thing. I read them, and then I went around the Internet reading as much info as I could find on how to pack up a bike, and I also watched lots of youtube videos on the subject that I found very helpful. And then I pretty much just went for it. Here's what I did.
The first step is to remove the pedals from your bicycle. Easier said than done! Mine were quite tricky to remove as they are really on there! But I did eventually get them off, labelled which side of the bike they came from and then stuffed them in a plastic bag with tape over the threads to protect them. Keep in mind that the directions of the threads is reversed on each side of the bike so that the action of pedalling will not loosen them. My pedals had friendly little arrows saying which direction tightened and loosened them.
TIP: As you remove anything from your bike do two things...
1. Start a pile of bike parts off to the side in one place of everything you need to remember to put in the bike box when you are done. You don't want to get there and realize you left your pedals on the coffee table!
2. Start another pile right next to that one of every tool you used to disassemble your bike. You are going to need those same tools to put it back together!
I then started by attaching my bike to the included metal internal support frame so that it didn't extend beyond the base of the frame in either direction. This is a simple matter of removing the wheels from your bike and attaching your bike frame to the metal support frame with the skewers included with the box. At this time also go ahead and remove the skewers from your wheels and place those in a plastic bag. Detailed in the instuctions is how to adjust the metal bars on the frame to make sure your bike doesn't end up riding below the aluminum frame (thereby exposing it to damage from a hit against the base of the bike case) or go beyond the left and right extremes of the frame. This process was fairly simple. Because my bike is still fairly new I also wrapped the frame near the drivechain with paper towels which I then wrapped masking tape around, and then I wrapped the entire drivechain components and chain in plastic shopping bags to keep the chain lube from getting on anything, or the chain from scratching up the frame.
Here is what things look like at this point. The angle of the photo makes it look like the rear derailleur extends beyond the aluminum frame, but I assure you it doesn't. In the plastic bags in front of the bike you can see the removed pedals and skewers from the wheels.

At this point the next thing to do is put the frame inside the bike box and see how things are fitting to figure out what else you will have to remove.

In my case it looks like I can leave the seat right where it is. Taller folks will very likely have to remove it. As a precaution I wrapped masking tape around the seat tube in case I needed to remember where it went should it loosen or get wacked in transit. If you were to remove it you would do the same.
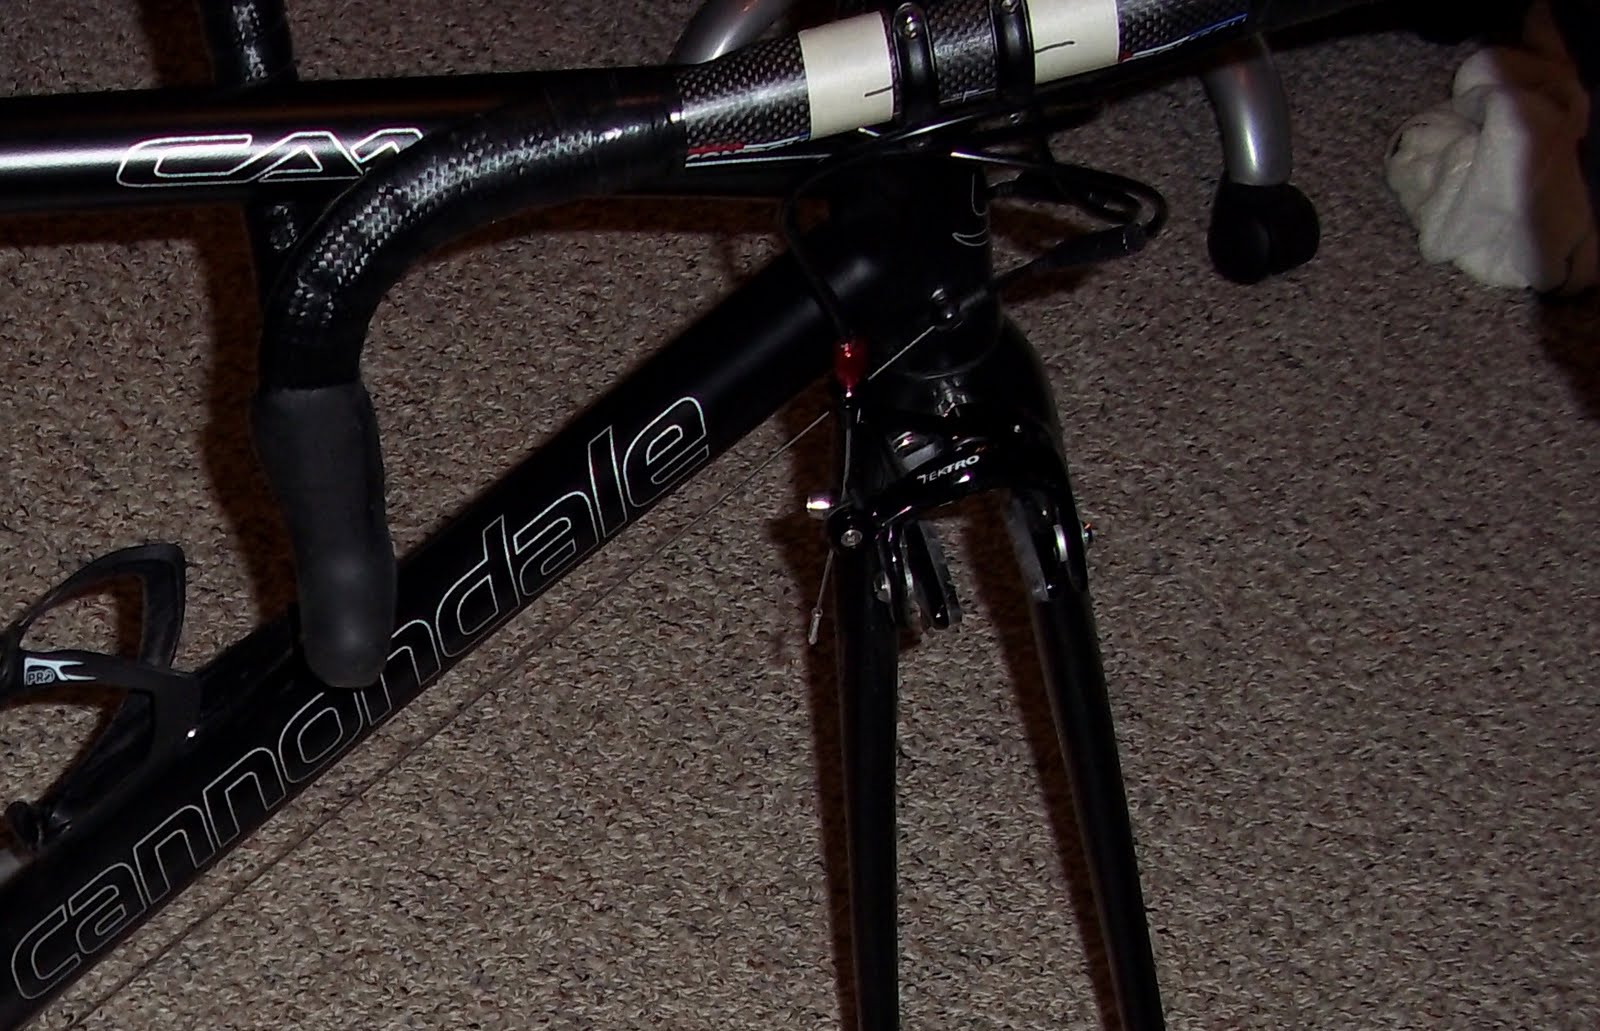
Next thing to look at and figure out is where your handlebars should go. In my case I was able to simply loosen the hardware that holds the bars at their set angle and roll them up and under the top tube so that they would fit in the case. People with larger bike frames will likely have to remove the handlebars and zip tie them to the top tube so that all the cables stay attached to them. Before I loosened anything I used masking tape to mark some alignment indicators so that I wouldn't be throwing all that money away I spent on a proper bike fit and I could get them right back where they were when I reached my destination. Again... be smart about this. Pack the masking tape with you as well so you can mark all this stuff when you pack it. back up! The below images shows the bars rotated upwards under the top tube, and the masking tape alignment markings.
So now we have the bike attached to the frame, the bars and seat dealt with, and the pedals removed. We are making some serious progress. Now its time to figure out how to protect the frame, and attach the wheels. We also now know that this contraption fits safely inside the bike box with nothing protruding beyond the bottom metal frame or the perimeter of the bike case. Check this multiple times as you do this!
After watching all those you tube videos I knew that I should attach each wheel to one side of the bike frame with some padding and zip ties at three points per wheel so that they wouldn't move around too much. Its also important to let most of the air out of the tires so when they expand as the altitude changes they don't pop! I played around with various positions of the wheels until I found the best placement for them. I started with the rear wheel as finding a place for the cassette to go (face it inwards towards the frame) was the trickiest bit. Once I determined their placement I wrapped those attachment points with some scraps from an old blanket and then zip tied them in place. I also added scraps of blanket to any point of the bike frame I wanted to protect to avoid scratching it anywhere.

The above photo shows the wheels attached and the frame padded out to protect it. An experienced bike packer may laugh at my overuse of padding. But this is my baby. And I wanted to protect it!
Random Tip: you can not pack any flammable items, or items under pressure in your bike box. So no chain lube, and no CO2 cannisters!
I do however want to backtrack a little bit... in an earlier photo you may have noticed these metal arms extending from the back of the frame upwards. You can clearly see it in the photo below. This is where your wheels are theoretically supposed to attach to. In my case when I was mucking about with these to figure out where they would go I managed to shear them completely off the frame (they were not 100% loosened at the bottom, but they weren't tight either) as I was adjusting them. Because of this I highly recommend that you remove them and ignore them. That one weld is just not up to the task of securely holding your wheel in place. If it were to shear off in transit that's a loose wheel and a pokey metal bar bouncing around wreaking havoc inside your bike box. In the interest of full disclosure I did not contact the manufacturer about this, or the distributor. I just ignored it and moved on.

So back to where we were.....
We now have the bike and all its bits attached to the frame, so now its just a matter of taking care of the little things. In my case I took some small string top backpacks and bagged up all the little bits and tools and found good places to stuff those in the bike box in cavities around the frame. I also managed to fit two bike helmets, my wetsuit, two pairs of bike shoes, 4 water bottles, all the tools used to take the bike apart, spare tubes, a spare tire, my saddlebag, bike pump, and "Stick" massager in there too. Its just a matter of bagging those things up or zip tieing them in convenient spots to the frame. Once thats done all thats left to do is close the lid, and close the latches and you are almost there. I shook the box a bit once it was closed up to listen to how much things were moving. I was pleased to not hear too much movement, but enough that things had some give to them. Rigid things will break, things that move around too much will break. The trick is to find the happy medium. At least that was my theory.
The latches on this case are lockable (although not TSA approved so you can't lock them if you are flying with the case) but they don't come across as being all that strong. A fellow club member Jon suggested I also put some ratchet straps or similar around the case. In fact the case even has some little recesses in the bottom of it to keep the straps in place. If you run it around those recesses, and then through the handles of the case leaving the latches of the strap on top it makes for a very secure case that you will feel much better about. The dark blurry black patch on the box is just where I blotted out my contact info that was written on the case. But you can clearly see the straps, and the recess at the bottom of the case where they fit nicely into.

So now all you have to do is get the thing to the airport. Which if you have a small car may prove problematic. However it fit nicely in the back of my mid size SUV without any trouble at all. It MIGHT fit in a 4 door with all the seats down, but it also might not. Its big! So get out a tape measure before you buy.
Once at the airport I started to panic. What were they going to charge me.. was it too big? too heavy? what if they won't take it then what do I do? But this is how I am at such things. I had a 6am flight and me and my bike box were waiting at the Southwest counter at 4am for them to open. Ugh!
As a sidenote I did lots of research as to what the various airlines charge to ship a bike. I learned a few things.
-they all charge different rates, and some of them even charge different rates at different times. There are people out there who were charged one thing to get their bike to point A, and a different thing to get it home again on the same trip! There is a serious lack of consistency!
-its important to tell the airlines its a bike or sporting equipment as the policies are better generally for those items than they are for oversized, overweight baggage. (although all policies differ so do your research!)
-check the airlines policy before you buy your ticket! If the ticket is 50 bucks cheaper but it costs 200 bucks more to ship your bike you haven't saved any money!
-the scary part of all this is that contacting the airlines is useless. They just refer you to their website rules which are vague and leave you nervous when you first approach the counter.
-just about every source I encountered said fly Southwest when possible. They charge 50 bucks each way for the box anyplace in the US, no B.S., no policy changes, no problems. So thats what I did.
So here I am standing at the counter waiting....excuse the poor photo quality its a cell phone picture at 4am!

They opened the counter not long after I got there. I was first in line and pretty nervous about the whole thing. The first words out of the very friendly woman behind the counter as I approached were "Is that a bike?" I said "yep!" She said ok, lets check you in over here. So she did that, charged me 50 dollars to ship it and wheeled it away for me. Nice and easy! I was all worked up for nothing.
I then spent the rest of that day worrying about how my bike was doing.... for the entire flight.
Then I landed in Seattle and headed to baggage claim. Hmmm... where exactly is my bike going to show up? I got my other piece of luggage and then saw this tiny sign that said "Oversize Luggage" and waited over there for a bit. It was probably only a ten minute wait but it felt like a year as I started to panic. And then my bike box appeared! Wooohooo! A quick scan of the box showed the outside looked intact. I couldn't wait so I flipped it on its side and opened it and gave everything a quick look over. Yay! It made it ok!
Then I started the laborious process of getting my bike to its destination. Not easy! Dragging a bike box through an airport and towards your rental car is no easy feat. The case has wheels although they are all locked in one direction so turning it means picking up the handle on the end and lifting the front to turn it. So you try not to turn and find nice straight routes. In order to get to my rental I had to go up an elevator, down a giant hallway, down an elevator, across the street, and then into a shuttle bus. Yikes! Be sure and have a bunch of one dollar bills with you. People will offer to help you along the way. The shuttle bus driver did a great job of helping me get the case in and out of the bus, and they deserve a tip for this. Plus its good karma!
In the end I found the cheapest vehicle to rent that I was guaranteed to be able to fit this giant box in was a pickup truck. Its much cheaper to rent than a minivan or Suv. In the end they gave me a giant BEAST of a truck. A full size Chevy Silverado with an extended cab so big I actually fit the bike box behind the driver seat!
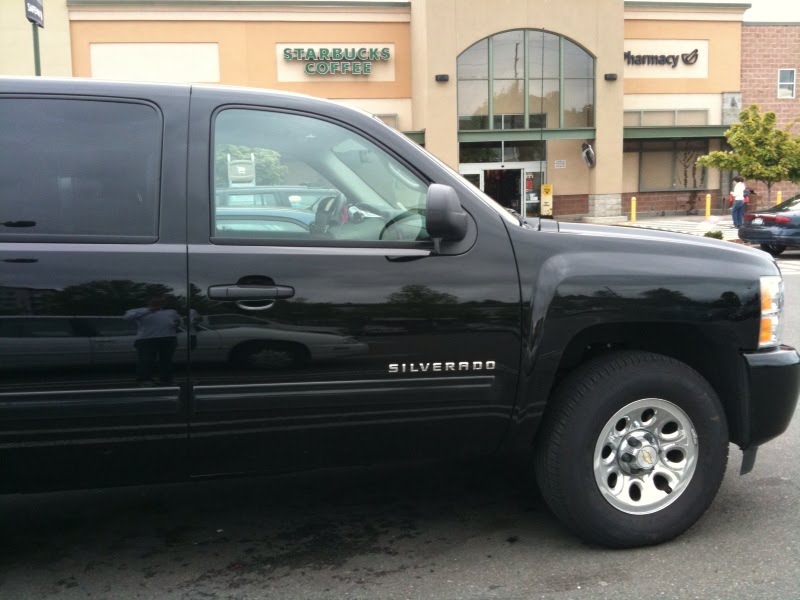
This location of behind the seat eventually became where I always kept the bike. It was my bike garage. (my eventual destination of San Juan Island, WA is so remote you can leave your truck unlocked with your bike in it and no one is gonna steal it.
I had a fantastic two weeks out in Washington state with some amazing riding out in Seattle, Redmond, and San Juan Island. I highly recommend it as a training destination.

And then it was time to go home. Which I did at a much more reasonable hour when the airport was much busier. Having gone through the process once already I was much more relaxed. So I had a lot more fun. When you drag a GIANT box through the airport people look at you funny and ask questions. So I started to have a little fun with it. On the rental car shuttle back to the airport I was making jokes out loud to my friend such as... "We should have thought of this before, its much cheaper to fly the kids this way!". And in the line at the ticket counter to check my box when people asked me whats in it I tried to have a different answer every time... "Oh its my girlfriend... its much more tolerable to fly with her this way" or "I can never decide what to pack, so I just bought a bigger suitcase". I was definitely having a lot more fun with it on the way out. Again at the counter as soon as they saw me coming I was pulled aside and checked in my an agent and simply charged 50 dollars. Then the yucky part happened. I was asked to roll the case to a TSA checkpoint where they can inspect it which I then did. I very very kindly said to the gentleman.. do you mind if I watch as you open the case as the latches are very finicky (they can be tricky to line up) and also just so you know its best to just loosen the straps, they are a bit of a pain to rethread if you completely undo them. In response to this I got a very grumpy and angry "I do this for a living you know, I don't need your help!" jerk! So instead I walked about 100' away and watched him search the case from a safe distance. He didn't listen to me at all and completely undid the straps and in the end had to spend ten minutes rethreading them. I tried to warn him! Anyway, he did a not so good job of repacking the loose items but everything showed up ok at the other end.
So mission accomplished! I would definitely do this again and I'm looking forward to bringing my bike with me on longer trips in the future. I hope this quickie guide is of some help to all of you out there, and if it is please leave me some feedback about it in the comments. If anything I just hope this gives someone who has never done it before the courage to go for it. Its not all that hard with some careful planning. So take your bike with you! Its so worth it!
Best Bike Travel Cases
ReplyDeleteSucceed! It could be one of the most useful blogs we have ever come across on the subject. Excellent info! I’m also an expert in this topic so I can understand your effort very well. Thanks for the huge help. bike shipping europe
ReplyDeleteBest Bike Travel Case
ReplyDeleteAppreciate all the details. Just started looking at cases. I saw a pro bike case that holds 2 bikes. Anybody have experience with those ?
ReplyDeleteIt was simple, inexpensive, and ideal for leisurely city exploration to rent a bike in Varanasi from Dau Rental Bike.
ReplyDeleteRent Bike In Varanasi
Varanasi's best bike rental service. Clean bikes, reasonable prices, and helpful assistance are all provided by Dau Rental Bike.
ReplyDeleteRent Bike In Varanasi
I had little trouble exploring Varanasi after renting a bike from Dau Rental Bike. Quick reservations and first-rate service.
ReplyDeleteRent Bike In Varanasi
Dau Rental Bike is a highly rated two-wheeler bike rental business in Varanasi.
ReplyDeleteTwo Wheeler Bike Rent In Varanasi
ReplyDeleteAffordable, reliable two-wheeler bike rent service in Varanasi by Dau Rental Bike.
Two Wheeler Bike Rent In Varanasi
Smooth bikes, quick booking, and helpful staff at Dau Rental Bike in Varanasi
ReplyDeleteTwo Wheeler Bike Rent In Varanasi
Highly recommended two-wheeler bike rent service in Varanasi from Dau Rental Bike.
ReplyDeleteTwo Wheeler Bike Rent In Varanasi